Moment’s Slow Shutter modes vs Live Photo’s Blur mode.
3 ways to take motion-blurred-images.
Recently the Moment Pro Camera app added Slow Shutter modes for still photography. While a slow shutter technique can be accomplished with the blur mode in the built-in Camera app’s Live Photos, there are limitations. Moment’s Pro Camera app gives you more control over the blur and and has two modes: Blur and Light Trails, that give you two different blur techniques. (If you’re a serious iPhoneographer, the new modes may help justify the $6 price tag for the app.) This article will help you understand the difference in the Live Photo Blur and the Moment Blur techniques, so you can choose the best one for a specific look or shooting scenario.
Why the iPhone Cam’s shutter really isn’t slow.
Much has gone into the iPhone’s built-in Camera app to keep your images from blurring. It can shoot as slow as half-a-second, which doesn’t work for most creative blur techniques. (The poetic car light trail photos you see in DSLR shots often kept the shutter open for 30 seconds.) Since the iPhone can’t do that, the apps combine a series of exposures to create the effect of blur. All images below were shot on an iPhone XS Max.
Live Photo’s Blur mode.

A Live Photo is actually a 3-second video taken at a choppy 10-frames-per-second. In the Live Photo mode (yellow target icon), 15 frames are taken before you tap the shutter and 15 frames are taken after. You can edit a Live Photo into a GIF-like video, or mix 30 frames into one image to create blur. The iPhone even crops and aligns the images when combining to help compensate for camera movement. To use the Blur mode: Swipe up while viewing any Live Photo > choose Blur.
This method often creates incredible blurred images and works well in daylight (something that requires added neutral density filters on a DSLR). But the technique has its limitations. It blends all 30 frames, so if you’re trying to blur a photo of a waterfall and the camera wasn’t held still for that second-and-a-half before tapping the shutter, it can give you to a wonky, mush-of-a-shot. (Tip: For a smoother blurred Live Photo, hold the camera in position for a two-count before tapping the shutter.) Blending 30 images also creates issues with fast movement: If you use Live Photos to shoot cars passing on the expressway, they’ll disappear, since they aren’t in one spot long enough to show. The blurred image will be of empty roadway.
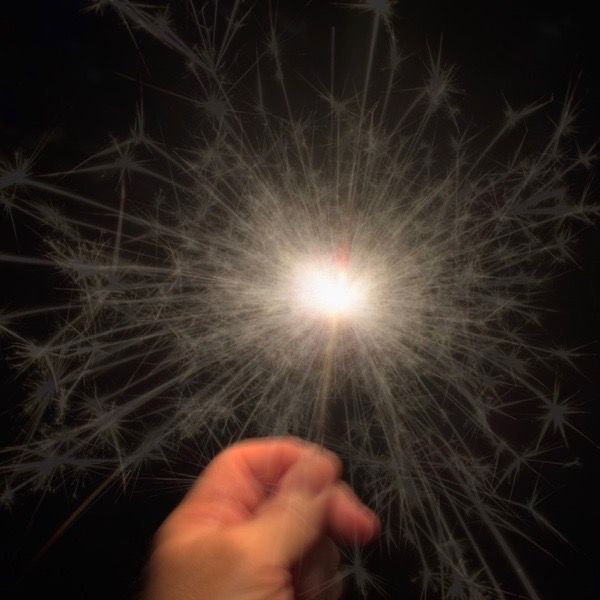
As you can see from the sparkler image above, the iPhone images are short exposures that froze the sparks. The individual white sparks show as gray, since each of the 30 images is dimmed in the mix. Only sparks that overlap show as bright.
Moment Pro Camera app’s Blur mode.
This works similar to the Live Photo Blur mode. It blends a series of images, that have been darkened to create a normal exposure. The difference in look from the Live Photo Blur mode here is that Moment appears to use a longer shutter speed in dim light for each image in the series. The result is a more convincing blur. The images are often dark and require some lightening in your photo editing software.
The big advantage of this method is that Moment gives you exposure options of 4 frames, 8, 15, 30 or Bulb for better control of your blur. The Bulb setting allows you to tap the shutter to start exposing the series and tap it again to stop. (At about 30 seconds, the series will automatically stop.) Like the Live Photo Blur, this technique works well in daylight, since it gives you the option of substantially longer exposures.
Moment Pro Camera app’s Light Trails mode.

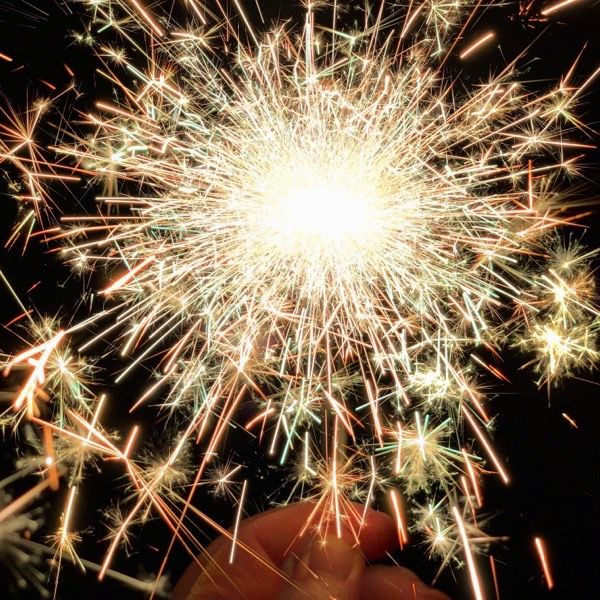
Light Trail mode was designed for night photography. It mixes the images in the series at full brightness. So sparks and headlight trails are nice and bright and the background also gets brighter as well. You’ll notice the sparks look more full than in the other two methods since they’re adding to each other with no dimming.
As with the Moment Blur setting, you can choose 4 frames, 8, 15, 30 or Bulb, for Light Trails, but you’ll have to take care to not overexpose.
The three techniques all give different results. The Live Photo Blur and Moment Blur settings offer you a creative blur tool that works well in daylight. The Light Trails mode also works well for any kind of night photography. (Tip: Even when working in daylight, use a tripod to blur the subject while keeping the background still and in sharp focus.)

Get the definitive book for mastering your iPhone camera: The Crap-Free Guide to iPhone Photography
