 wolfe with an e's blog
How to Take Impressionist Blurs with your iPhone and Pro Camera by Moment

Intentionally blurring an image is a highly emotive technique. Your iPhone can take a rapid-fire succession of hundreds of images of a scene while the camera is moving and combine them into one. I’ve covered mounting your iPhone on a tripod and using this technique for cloud blurs, but this article will show you expressive handheld techniques that give you results Claude Monet would be proud of.
Pro Camera by Moment
You can do motions blurs with an iPhone Live Photo but that technique limits you to combining a dozen or so images. For more control over handheld blurs I use Pro Camera by Moment It’s $6.99 and offers some advanced still and video capabilities that make it worth the price.
Creating a Motion Blur preset
Other camera apps can do similar techniques, but what I like about Pro Camera is that it lets you easily call up a preset that uses the Slow Shutter workflow and Bulb mode. This will keep shooting images until you press the shutter again for blurs in daylight. To create a preset:
- Open the Pro Camera by Moment app.
- Choose Slow Shutter.
- If it says Light Trails on the bottom left, tap it so Motion Blur appears.
- Drag the shutter speed slider left until it says Bulb.
- Tap Preset.
- Tap Create a New Preset.
- Tap My New Preset and name it something like Day Blur.
- Tap Save.
Using the preset
You can now call up the above settings by tapping the Preset button and choosing it from the list. Exposure is automatically handled by the app so the shooting process is simple:
- Tap the shutter to shoot.
- Make your move.
- Tap the shutter to stop.
How to move
How you move during the exposures will greatly determine your final image. Your first few tries may lead to a visual mush, so here are some helpful tips.
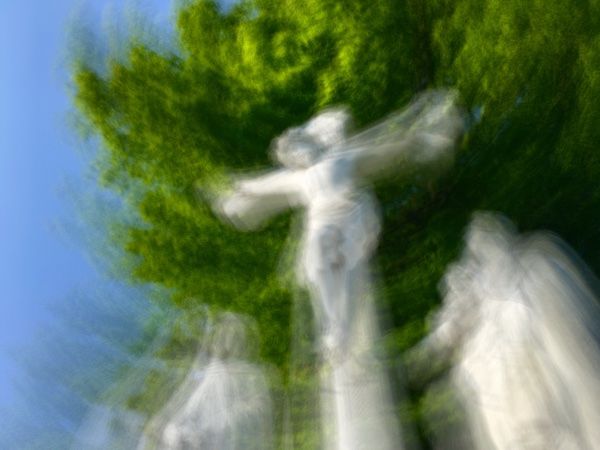
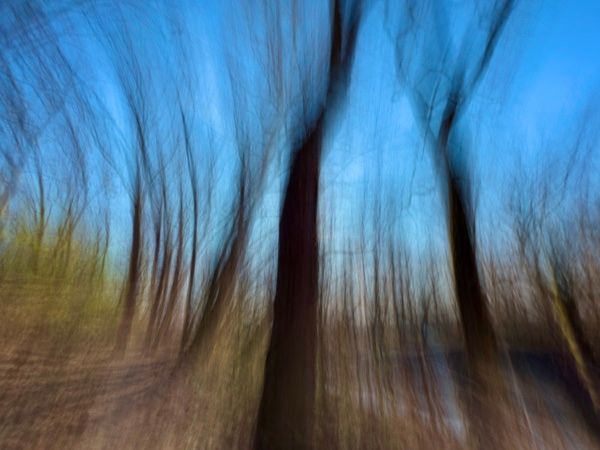
- Bold, easily-recognizable subjects survive the process better. Subjects with dark lines like the trees here are a good place to start.
- Move with dominant lines. In the tree shot here, I tilted the camera up during the exposures to help emphasize the tall shapes of the tree trunks.
- Try various shutter lengths and speeds of movement. Results will vary greatly depending on these two factors. Keep the shutter open for a second as you move or for a full minute letting natural hand movement slightly blur the scene. Different subjects will call for different techniques.
- Try different cameras. The Ultra Wide camera will give you very different results than the Tele.
- Try pan, spin or swoosh movements. There are no rules on how to move.
- Increase or decrease EV slightly to control exposure. It’s better to control exposure when shooting than to try to compensate when editing. A slight change on the EV slider in the app can make a big difference in lightening and darkening the final image.
- Edit the sequence. Pro Camera saves the sequence as a Live Photo. It starts with the first images and then compiles more images further along the Live Photo clip. Tap edit and then tap the Bullseye icon to edit the sequence. So if an image looks a little too busy you can choose a less complex key frame. The GIF below shows the sequence of a photo as my iPhone tilted up.
- Adding Contrast or Definition when editing can reveal the images that make up the composite. Maybe you want that, maybe you don’t. It can get gritty and reveal more texture.
My take.
You’ll find even small changes in this technique will mean the difference between something ho-hum and something magical. Plan on a lot of experimentation.

Get the definitive book for mastering your iPhone camera: The Crap-Free Guide to iPhone Photography Updates for the new iPhone models are always free.