 wolfe with an e's blog
Bringing marble sculpture photos to life with the multiply blend in iOS.
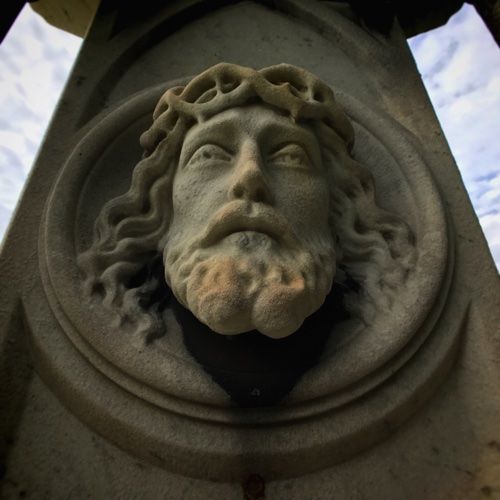
White marble sculptures (especially reliefs) can look flat and lifeless in natural light. It’s a shame, since these are often amazing, lifelike works. Conventional controls, like exposure and contrast tend to make matters worse. But there’s a blending technique called multiply that can enrich white marble in diffuse light, saturating subtle colors and adding a very real dimension to the stone.
What’s the multiply effect?
Multiply is a blend effect that multiplies the values of corresponding pixels in two images. When two identical images are blended using multiply, you get a progressive darkening. Multiply slightly darkens the highlights in the marble, while more deeply darkening the shadows. Since 2/3 of light values are highlights, there are plenty of tones in marble that the multiply effect can use to enliven carved stone.

How to use the multiply blend.
There are many apps for iOS that can do multiply blending, like Union or BitPoem. I find it easiest to work with Image Blender.

Here’s the process:
- Open Image Blender.
- Tap the Background square on the bottom left and choose your image.
- Tap the Foreground square on the bottom right and choose the same image.
- Tap the double squares icon at the top center.
- Tap Multiply and swipe down on iPhone (on iPad: tap Multiply and touch the screen).
- Drag the slider right until the restoration looks good.
- Tap the Share icon (square with up arrow).
- Tap Save Image.
A few notes on the multiply effect.
- It doesn’t work on areas of pure white. These don’t multiply, so the pure white areas can look awkwardly bright.
- It emphasizes weathering. Over the years, marble statues on graves get weathered. The multiply blend makes this more pronounced, sometimes distracting from the realism and sometimes adding to it.
- The effect doesn’t work on granite. It emphasizes the speckles.
- You can adjust images in Image Blender. You can modify exposure, contrast and saturation of either photo. So if you want a brighter or less saturated result, reduce the contrast and saturation of one photos. To access the filters, tap the thumbnail on the bottom right or left and choose Filter.

Get the definitive book for mastering your iPhone camera: The Crap-Free Guide to iPhone Photography