 wolfe with an e's blog
Pro use of the Sony UX560 Pocket Recorder.
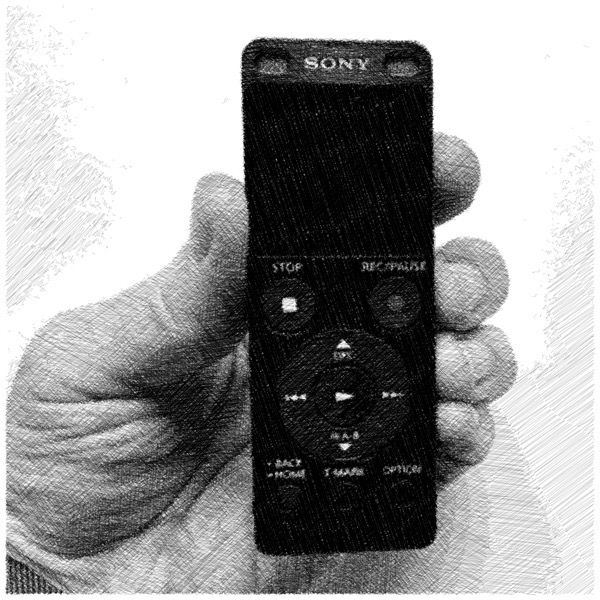
The Sony UX560 isn’t sold as a professional recorder, but teeters on that edge of this category with decent, built-in stereo mics, a line input and CD-quality recording. It can be a useful little box as a back-up/on-location podcast recorder, background sound recorder for video, sound sampler, music idea recorder, etc. This article will show you how to use this device and get the best quality recordings.
The UX560 is very pocketable at a third-of-an-inch thick, four-inches long and an inch-and-a-half wide, as well as less than 2 ounces in weight. It has a built-in, retracting USB plug and can record up to 4Gb on internal memory or more than 64Gb on a Micro SD card. Recording quality is good when set precisely and used properly.
Forget the MP3 settings.
Don’t be lured in by the high-quality MP3 settings on the UX560. They save space and sound crisp, but they lack realism, don’t sync well with video and aren’t really workable for audio editing. On the other hand, the LPCM 16-bit/44.1-kHz WAV setting records stereo, uncompressed CD-quality audio. To set:
Home > Settings > Recording Settings > REC Mode > LPCM 44.1 kHz/16-bit > Play
What’s “CD Quality” and is it good enough for my needs?
This is considered the lowest level of professional recording quality and is the standard for Audio CDs and better than the quality of most downloadable files. These 16-bit/44.1-kHz files have a frequency range to to about 22kHz (just beyond the edge of human hearing) and a noise floor of -93dB, so no discernible digital noise is added to the file. The UX560’s CD-Quality files are practical for most audio and video uses.
Working with the built-in stereo mics.
The mics are impressive, considering they’re built into a small, $80 device. Each mic has a port in the front and another on top. The front ports appear to have built-in windsreens that makes them a little less sensitive, a bit bassier and give consistent sound to both channels for good voice recording at close range. The top ports are designed for capturing discrete stereo sound and are useful for a two-person interview, stereo music performance, etc.
The front and top ports are both always live. So if you try to do voice recording in a noisy place or ambient environment, the top ports will still pick up ambience and sound reflections. You can tape over either set of ports with snippets of Quiet Barrier tape to help mute the sound. Or another trick is to tape off one front port and one top port. This will give you mostly voice in one channel and mostly background in the other for a better balance of the two when mixing in mono later.
Controlling levels on the UX560.
The level controls on the UX560 are designed to be simple, which means you have little manual control. You do have some control over mic sensitivity, but the biggest issue is that the auto-level control is always on.
The mic auto levels suck.
That is to say the auto levels are always on and can suck the volume up, as well as deaden the peaks at the more sensitive settings. Sensitivity controls both input volume and the aggressiveness of the compressor. This table shows what’s happening at the various settings of the UX560, what scenarios they work best in and distances for the mic from the sound source. Your mileage may vary:
| Setting | Sensitivity | Compression | Scenario |
|---|---|---|---|
| Voice Auto | Highest | Highest | Distant presenter and questions from audience |
| Voice High | High | High | Large conference room |
| Voice Medium | Medium High | Medium High | Small conference room |
| Voice Low | Medium | Medium | Dictation @ 6in |
| Music High | Medium Low | Medium Low | Sound FX/Acoustic group @ 6ft |
| Music Medium | Low | Low | Acoustic group @ 12ft/voice + guitar @ 12in |
| Music Low | Lowest | Lowest | Acoustic guitar @ 6in/Rock band in club |
These are suggested starting points. Generally, you’ll want to use a sensitivity setting that keeps the average levels down to about -12dB, which is clearly marked on the UX560’s meter. This helps to ensure that peaks don’t go above 0dB where they can get into some abrupt clipping. If you go hotter, your recordings can distort. If you go lower, you’ll begin to pick up analog circuit noise at usable levels. Note that you can change the sensitivity without stopping a recording. To set sensitivity:
Home > Settings > Recording Settings > Built-In Mic Sensitivity > choose For Music/For Voice > choose High/Medium/Low/Auto > Play
If you have good levels, the compression won’t likely be obvious. Here’s an audio clip of a thunderstorm recorded from a second-floor window at the Music High setting. The peak of the thunderclap was recorded at about -12dB and the file was normalized. No EQ or other processing was added. (Now seriously: Put on your headphones so you can really hear it:)
The UX560 is clearly picking up the raindrops that are hitting stone about 20 feet away and the train whistle in the background. When the thunder hits, you can hear the level of the rain dip a bit and then come back up. For my tastes, this compression rate still qualifies as normal.
External mics.
While the internal mics in the UX560 work well for most situations, you may find a lavalier or handheld mic better fits your recording needs. Most mono and stereo mics with an eight-inch plug will work well with the UX560, but make sure they’re decent quality.
Using the line in.
The eighth-inch mic jack on the UX560 doubles as a line in. I find this works well as a performance recorder for a mobile sampler (like the Rolland SP-404) or from a mixing board line out. To set up:
Settings > Recording Settings > Ext Input Settings > Audio In > Use Sync Record Function > No
Once this is set, you won’t need to change it. The UX560 has a true line level with no auto levels, so make sure the line level coming from your input device is at the -6dB peak range.
Post processing your recordings.
Audio files usually benefit from some post processing, no matter how good the recorder they were recorded on. Here are some starting points:
- Normalization This optimizes volume level of the file by taking the loudest sound and raising it to 0dB. The whole file gets louder, but doesn’t clip. This is useful on most files you record and necessary on any files that peak
- Expansion If you recorded at a higher sensitivity setting and hear noticeable volume surges between the loud and quiet parts, you may need expansion to reverse the compressor and smooth the changes.
- Enhancement This is a vague category that may use phase alignment, harmonic processing and other magic tricks to sweeten recordings. These can be useful for demudding your recordings and crisping up the high end without overblowing the treble. Enhancement is a kind of a high-tech EQ.
- Noise Reduction This will only likely be an issue if you recorded the file at a low level and normalization has made analog circuit noise obvious.
Transferring files to your computer or iPad Pro.
Since the UX560 has a built in USB plug, you can a plug it into a computer to extract files from the Internal Memory or Micro SD drive. Just plug it into the USB jack on the computer and Recorder Memory and Memory Card (if you have one in the UX560’s memory slot) will pop up on your desktop or with other drives. When you’re done, it seems the correct procedure for unmounting the drives without getting warnings is ejecting the Recorder Memory first and then the Memory Card.
Also, Apple’s USB-C to USB Adapter lets you pull files off either drive through the Files app in iPad Pro. These can then be shared with audio editing apps or iMovie. You can also delete audio on the Sony with the Files app.
A few pointers.
- If you remove your Micro SD card to record your files, the UX560 will default to storing in internal memory. You’ll need to reset it if you want to record to the card: Option > Recording Folder > SD Card
- The built-in USB plug is for both file transfer and charging the internal battery. A few minutes plugged into USB will give you a few extra hours of record time. The UX560 can also charge while recording.
- As with all handheld recorders, you can get friction noise when holding the UX560. It’s best to set the UX560 on a padded surface or rig a mic holder with a dead USB female socket when recording.
- On the bottom left of the UX560, there’s a spot to attach a lanyard so you don’t easily lose the device.
- Playback volume will distort when listening through the built-in speaker at louder levels. This distortion is in the speaker, not in the file.
- Avoid messing with the frills like Clear Voice, filters and VOR. Some are harmless playback settings, but others will affect recording quality.
My take.
The Sony IC-UX560 is a lot of recorder crammed into a tiny box. It can be argued that the lack of recording options for better-than-CD-Quality is a minus for pro and prosumer uses. But many audio professionals, podcasters and YouTube video makers use the UX560 because it gets the job done and is more convenient than portable recorders like the Zoom H1, Tascam DR-05X, Rolland R-07. These can record “High Resolution” audio at 24-bit/96 kHz, but are a bit more pricey, substantially bulkier, quickly burn through disposable batteries and result in files that can be substantially larger. One thing to consider here is that most of the audio files people work with (like samples and recordings) are CD quality at best, so I find that HR audio is often overkill for most purposes.